5 Step Guide to Caster Wheel Installation – Top Plate Casters
- 29 Mar, 2023
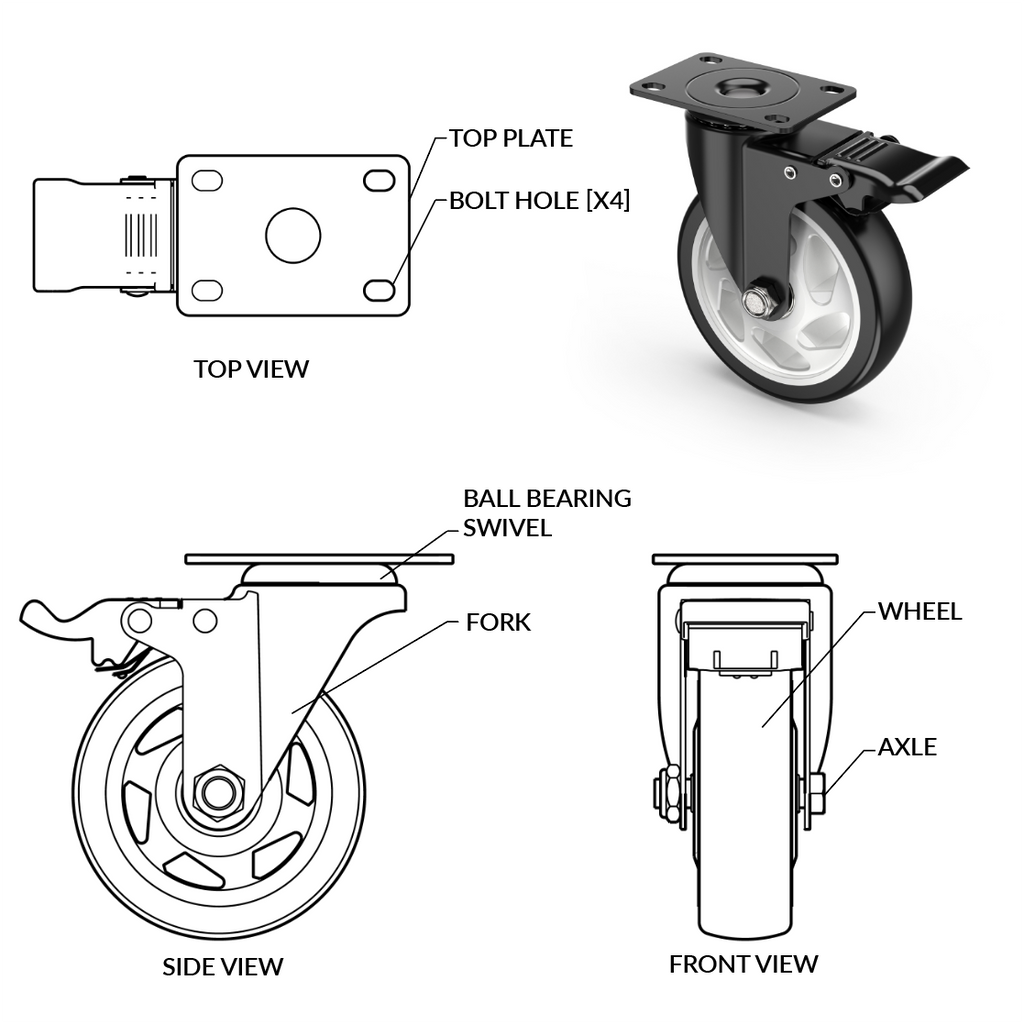
Top plate casters (also known as "flat plate casters") are one of the most common types of casters. We provide a simple and straightforward installation method for this purpose. These casters are usually mounted on flat structures, such as wooden boards.
There are installation guidelines that should be followed when considering casters installation to ensure trouble-free operation and long life of casters.

Before we discuss the installation considerations, the following criteria should be considered to ensure the correct castor wheel has been selected:
Load Capacity (additional 33% should be added to take into account overload)
Consider number of Castors.
Wheel Type / Flooring Type
Manoeuvrability (Wheel Size)
Fixing Method (i.e. Top Plate Fixing)
Environmental & Contamination
STEP 1
Prepare the surface and structure for the casters – It is important that the structure on which the casters will be installed is strong enough to support the load. For example, if you are attaching casters to a previously immovable item such as a table, you should consider that the casters will concentrate the weight of the object in the area where the top plate is loaded, causing the caster top plate to take too much weight. Therefore, it may be necessary to reinforce the load-bearing area of the roof with additional material for added strength.
For large, heavy equipment, consider having casters on the center or outside edges to provide additional support to prevent buckling of the structure.
STEP 2
Position the caster mounting holes - place the top plate on the board and position it where you want it (make sure not to get close to the edge of the board). Now, use a pencil to mark each hole locations on the wood.
Repeat the above steps for each caster location
NOTICE: The alignment of the casters is very important. Casters should normally be positioned symmetrically +/- 1mm unless other alignments are designed, but alignment is important to ensure that stress is not applied to the caster fork which could cause the fork to bend during 'turning'.
STEP 3
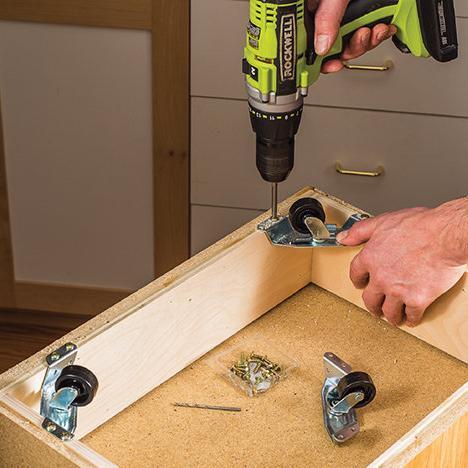
Pilot Holes - Check that the positioning of the bolt holes is aligned, then drill pilot holes. Using a drill bit that is 50% of the bolt diameter, drill a pilot hole for each bolt hole location.
STEP 4
Mount the casters – place the casters in the pre-marked locations and screw into the unit. The strength of the screw/bolt is important, we recommend class 8.8 for best performance
STEP 5
Check mobility - After installing the casters, you should test the unit to make sure all the wheels will perform as desired. Any wheels that are not in full contact with the floor surface need to be noted, in which case filler spacers should be used to correct the height.
Disclaimer: Information is for informational purposes only. Installers should ensure they have sufficient experience and knowledge to undertake any project. Installers should contact Holkieusa Casters for guidance on their exact application as caster installation considerations and practices may differ from those stated herein.


